10 Steps to Better Entry Door Installation
ProVia shares 10 tips on how to achieve a smooth door installation
Pre-hung entry door installations can be a bit deceptive in that they seem to offer straightforward installation—just insert, fasten, and walk away. But door installation requires a bit more nuance and savvy to get it right, not because there’s anything wrong with the door, but because of the likelihood that the house isn’t perfectly level and plumb. This is particularly true with remodeling projects, where years and decades of settling and movement can put the entryway askew.
Here are a few tips from ProVia, whose Signet smooth fiberglass door and DuraGuard storm door are part of the Model Remodel project, to ensure your entry door replacement goes smoothly.
- Inspect the old door and the new door. Always inspect what you’re working with ahead of time so you can plan accordingly. And, perhaps most important, don’t tear out the old door until you’re sure the new door is going to fit in the existing hole.
- Build a relationship with the homeowner. You’re about to tear a hole in their house, so make sure the homeowners are aware of how you’ll be conducting your work, what to expect, and how long it may take. Also, be sure to move any household or home décor items nearby that might get damaged.
- Check the walls. After you remove the original single door, use a 6-foot level to check the walls on each side to see if they’re plumbed the same. If they are not, you will need to adjust the installation accordingly.
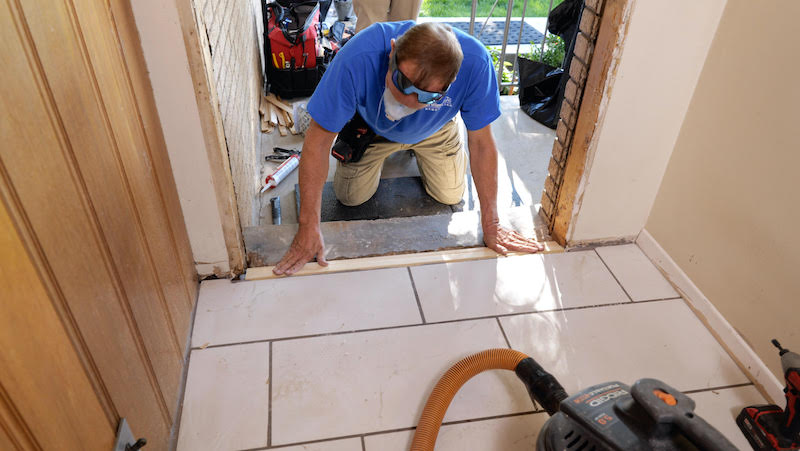
- Check the subfloor. Occasionally the subfloor on an existing home may not be level, says Conrad Mast, director of installation support at ProVia, so you’ll likely need to prep the subfloor to make it level before you install the new door.
- Dry fit the door. Always dry fit the door to gauge how it sets—is there room to shim on each side? Shimming will always be necessary in order to install a door properly.
- Prepare the sill. Lay two parallel beads of caulk under the unit and around the perimeter of the exterior opening where the exterior trim will lie.
- Set the door into the opening. Place the first screw through the head of the brickmold to keep the door secure until it’s fully fastened. This will also allow for adjustments at the bottom. Then, put the screws through the bottom of the brickmold, 8 to 10 inches up.
- Open the door. At this stage, it’s important to conduct a first check to make sure the door is in plane. When you close the door, does it fit into the pocket well? Check for maximum margins of 1/8 to 3/16 inch on the hinge side, strike, and header by looking at the four corners.
- Shim properly. Focus first on the top hinge by installing a smooth shank screw because the weight of the door is hanging from that hinge, Mast advises. Second, focus on the bottom hinge because the weight of the door is compressing there, and apply shims in that location. When shimming, always alternate inserting the thick and thin sides of the shim. Fasten and then step back to look at the margins again and adjust the screws as needed. Next, shim the top hinge and fasten, and then the middle hinge. It’s important not to over-shim the middle hinge because it could cause the top of the door to shift toward the strike side. On the strike side, the most important places to shim are immediately above and below the deadbolt as well as immediately behind the strike. Try to avoid installing screws through shims.
- Add insulation and aesthetic features. Once you’re sure the margins are between 1/8 and 3/16 inch, and the door slab is on plane with the jambs, you can complete the aesthetic portion of the door, such as any aluminum cladding. Fill the void around the perimeter of the jamb with a low expansion foam to prevent air leakage.
Manufacturers also provide a wealth of resources for installation tips. ProVia, for example, offers the Installation Certification Program, an intensive two-day class that equips remodelers and contractors with proper installation methods for initial installation and tips for service issues. Those who complete the program will be designated as a Certified Installer in ProVia’s service provider listings, which instills greater confidence in potential homeowner customers.
To learn more about ProVia doors, visit www.provia.com.
Follow along with the 2020 Model Remodel.